-
Tuist에서 Lottie 리소스 설정하기 (with. JSON)Tuist 2023. 4. 13. 09:42
안녕하세요. 그린입니다🍏
이번 포스팅에서는 Tuist를 통해 Lottie 구현을 위한 리소스 설정을 해보고 그걸 사용해볼까 합니다🙌
우선 Lottie가 무엇인지 아주 간략하게 짚어볼까요?
Lottie 간략하게 짚고 넘어가기
Lottie는 에어비엔비에서 만든 라이브러리로, 기본적으로 벡터 기반 애니메이션과 아트를 최소한의 코드로 실시간 렌더링 해주는 iOS/AOS에서 모두 지원 가능한 모바일용 라이브러리입니다!
Bodymovin JSON 형식으로 내보내진 애니메이션과 벡터를 로드해 렌더링 해줘요.
여기서 오늘 우리가 다뤄볼것이기도 한데요.
JSON 형식으로 Lottie 리소스 파일이 구성되어 있다~ 정도만 여기선 알면 될것 같습니다.ㅎㅎ
그 JSON 파일을 리소스로 받아 우리는 애니메이션을 만들어볼거다! 라는겁니다😃
(조금 더 자세하게 Lottie를 알아보실 분은 아래 포스팅을 참고해주세요!)
https://green1229.tistory.com/235
Lottie
안녕하세요. 그린입니다🟢 이번 포스팅에서는 Lottie라는 라이브러리를 알아보려합니다🧐 애니메이션은 항상 어려운데... 정말 어려운데🙃 기본적으로 애플에서 제공해주는 API들로만 하기에
green1229.tistory.com
자 그럼 이 Lottie 구현을 위한 리소스 파일인 JSON 형식의 파일들을 어떻게 Tuist에서 심어주고 템플릿화도 시킬 수 있을까요?
Tuist에 Lottie 리소스 설정하기
우선 우리는 Font, Assets등의 리소스로 타겟에 심어줄때 ResourceSynthesizers라는 인자를 이용해줬어요.
Tuist 공식 문서를 보시면 아래와 같이 SwiftGen에서 제공하는 모든 파서를 Resource Synthesizers가 지원해준다고 해요.
즉, Tuist내에 SwiftGen 기능을 포함하고 있다고 보시면 됩니다!

그렇다면 이 Tuist에서 제공해주는 SwiftGen 기능에 뭐가 있을까요?

요렇게 많은것들의 리소스 생성 관리 자동화를 지원해준다고 해요.
여기서 우리가 오늘 다뤄볼것이 보이죠?
json입니다!
이제 우리는 두가지 방법을 통해 지원해줄 수 있습니다.
첫째로, Lottie 그 자체로 지원을 해주도록 한다.
둘째로, JSON 템플릿화 시켜 Lottie 파일도 json 확장자로 구성되게 한 후 JSON으로 다룬다.
요 두가지를 하나씩 해보죠!
Lottie.stencil
첫번째 방법인데요.
Tuist 파일 내부에 Lottie.stencil이라는 파일이 있습니다.
요 파일을 가지고 만들어줍니다.
// swiftformat:disable all
// swiftlint:disable all
{% if files %}
{% set accessModifier %}{% if param.publicAccess %}public{% else %}internal{% endif %}{% endset %}
{% set documentPrefix %}{{param.documentName|default:"Document"}}{% endset %}
import Foundation
#if canImport(Lottie)
import Lottie
// MARK: - Animations Assets
{{accessModifier}} extension AnimationAsset {
  {% for file in files %}
  static let {{file.name|swiftIdentifier:"pretty"|lowerFirstWord|escapeReservedKeywords}} = Self(named: "{{file.name}}")
  {% endfor %}
}
// MARK: - Animation Helpers
{{accessModifier}} extension AnimationAsset {
  /// All the available animation. Can be used to preload them
  static let allAnimations: [Self] = [
    {% for file in files %}
    Self.{{file.name|swiftIdentifier:"pretty"|lowerFirstWord|escapeReservedKeywords}},
    {% endfor %}
  ]
}
// MARK: - Structures
{{accessModifier}} struct AnimationAsset: Hashable {
  {{accessModifier}} fileprivate(set) var name: String
  {{accessModifier}} let animation: Lottie.Animation?
  {{accessModifier}} init(named name: String) {
    self.name = name
    if let url = Bundle.module.url(forResource: name, withExtension: "lottie") {
      self.animation = LottieAnimation.filepath(url.path)
    } else {
      self.animation = nil
    }
  }
  // MARK: Hashable Conformance
  {{accessModifier}} static func == (lhs: Self, rhs: Self) -> Bool {
    return lhs.name == rhs.name
  }
  {{accessModifier}} func hash(into hasher: inout Hasher) {
    hasher.combine(self.name)
  }
}
// MARK: - Preload Helpers
{{accessModifier}} extension AnimationAsset {
  /// Preloads all the Lottie Animations to avoid performance issues when loading them
  static func preload() -> Void {
    for animationAsset in Self.allAnimations {
      _ = animationAsset.animation
    }
  }
}
#endif
{% else %}
// No files found
{% endif %}
이러한 Stencil 파일인데요.
하나 고쳐야될건 AnimationAsset Struct 구현부를 보면 self.animation = LottieAnimation~~ 되어 있는 부분이 있어요.
요 부분이 Tuist 파일에서는 Lottie.Animation으로 사용되는데 지금 Lottie에서는 LottieAnimation으로 바뀌어 수정해주면 됩니다.
이 Stencil 파일을 각 프로젝트 폴더 경로에 위치한 Tuist > ResourceSynthesizers 폴더에 생성해줍니다.
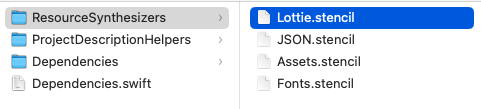
요렇게요!
그럼 이제 필요한 Lottie 파일들을 돌아줄 모듈 타겟 Resource 폴더에 넣어줘요.

여기서 중요한건 해당 파일이 JSON 형식이지만 확장자는 .lottie가 되어야 합니다.

이렇게 사전 빌드업이 끝났으면 이제 실제 모듈 타겟에 심어줘야겠죠?
원하는 모듈 타겟 Project 파일을 열어 아래와 같이 resourceSynthesizers에 구성해줍니다.
import ProjectDescription
import ProjectDescriptionHelpers

let project = Project.make(
  name: "DesignSystem",
  targets: [
    .make(
      name: "DesignSystem",
      product: .framework,
      bundleId: "com.green",
      sources: ["Sources/**"],
      resources: ["Resources//**"],
      dependencies: [
      ]
    )
  ],
  resourceSynthesizers: [
    .custom(name: "Lottie", parser: .json, extensions: ["lottie"]),
  ]
)
우리는 Lottie.stencil 파일을 커스텀하게 심어줬고 이걸 이용할거라 .custom을 사용합니다.
불러올 스텐실 파일의 네임은 Lottie이고 형식은 JSON입니다.
마지막으로 해당 리소스들의 확장자는 lottie이기에 요렇게 설정해주게 됩니다.
이제 다 끝났어요! 실제 tuist generate를 통해 돌리면 해당 모듈 Derived > Source 폴더에 TuistLottie+DesignSystem.swift라는 Stencil을 돌아 자동화되어 파일이 생성됩니다.
그리고 실제 구현부에서 Lottie에 해당 만들어진 이름을 넣어주면되요.
struct MainView: View {
  var body: some View {
    LottieView(
      jsonName: AnimationAsset.lottieFile.name,
      loopMode: .repeat(3.0)
    )
  }
}
여기 내부 LottieView는 구현 혹은 커스텀하게 사용했다고 가정합니다!
자 그럼 이 다음으로 JSON 확장자로 설정되있고 요 JSON을 통해 만드는걸 보겠습니다.
JSON.stencil
JSON도 stencil 파일이 있어요.
그런데 Tuist에서는 찾을 수 없고 Tuist도 SwiftGen을 탑재한거라 SwiftGen 소스를 봐야합니다.
SwiftGen에 아래와 같이 JSON.stencil 파일이 존재해요.

형식은 이렇게 설정되어 있습니다.
// swiftlint:disable all
// Generated using SwiftGen — https://github.com/SwiftGen/SwiftGen

{% if files %}
{% set accessModifier %}{% if param.publicAccess %}public{% else %}internal{% endif %}{% endset %}
import Foundation

// swiftlint:disable superfluous_disable_command
// swiftlint:disable file_length

// MARK: - JSON Files
{% macro fileBlock file %}
  {% call documentBlock file file.document %}
{% endmacro %}
{% macro documentBlock file document %}
  {% set rootType %}{% call typeBlock document.metadata %}{% endset %}
  {% if document.metadata.type == "Array" %}
  {{accessModifier}} static let items: {{rootType}} = objectFromJSON(at: "{% call transformPath file.path %}")
  {% elif document.metadata.type == "Dictionary" %}

  ⭐️⭐️⭐️여기 더 쉽게 사용하도록 이름을 불러올 수 있도록 구성해줘요
  public static let name = "{% call transformPath file.path %}"
  ⭐️⭐️⭐️

  private static let _document = JSONDocument(path: "{% call transformPath file.path %}")
  {% for key,value in document.metadata.properties %}
  {{accessModifier}} {%+ call propertyBlock key value %}
  {% endfor %}
  {% else %}
  {{accessModifier}} static let value: {{rootType}} = objectFromJSON(at: "{% call transformPath file.path %}")
  {% endif %}
{% endmacro %}
{% macro typeBlock metadata %}
  {%- if metadata.type == "Array" -%}
    [{% call typeBlock metadata.element %}]
  {%- elif metadata.type == "Dictionary" -%}
    [String: Any]
  {%- elif metadata.type == "Optional" -%}
    Any?
  {%- else -%}
    {{metadata.type}}
  {%- endif -%}
{% endmacro %}
{% macro propertyBlock key metadata %}
  {%- set propertyName %}{{key|swiftIdentifier:"pretty"|lowerFirstWord|escapeReservedKeywords}}{% endset -%}
  {%- set propertyType %}{% call typeBlock metadata %}{% endset -%}
  static let {{propertyName}}: {{propertyType}} = _document["{{key}}"]
{% endmacro %}
{% macro transformPath path %}
  {%- if param.preservePath -%}
    {{path}}
  {%- else -%}
    {{path|basename}}
  {%- endif -%}
{% endmacro %}

// swiftlint:disable identifier_name line_length type_body_length
{{accessModifier}} enum {{param.enumName|default:"JSONFiles"}} {
  {% if files.count > 1 or param.forceFileNameEnum %}
  {% for file in files %}
  {{accessModifier}} enum {{file.name|swiftIdentifier:"pretty"|escapeReservedKeywords}} {
    {% filter indent:2," ",true %}{% call fileBlock file %}{% endfilter %}
  }
  {% endfor %}
  {% else %}
  {% call fileBlock files.first %}
  {% endif %}
}
// swiftlint:enable identifier_name line_length type_body_length

// MARK: - Implementation Details

private func objectFromJSON<T>(at path: String) -> T {
  {% if param.lookupFunction %}
  guard let url = {{param.lookupFunction}}(path),
  {% else %}
  guard let url = {{param.bundle|default:"BundleToken.bundle"}}.url(forResource: path, withExtension: nil),
  {% endif %}
    let json = try? JSONSerialization.jsonObject(with: Data(contentsOf: url), options: []),
    let result = json as? T else {
    fatalError("Unable to load JSON at path: \(path)")
  }
  return result
}

private struct JSONDocument {
  let data: [String: Any]

  init(path: String) {
    self.data = objectFromJSON(at: path)
  }

  subscript<T>(key: String) -> T {
    guard let result = data[key] as? T else {
      fatalError("Property '\(key)' is not of type \(T.self)")
    }
    return result
  }
}
{% if not param.bundle and not param.lookupFunction %}

// swiftlint:disable convenience_type
private final class BundleToken {
  static let bundle: Bundle = {
    #if SWIFT_PACKAGE
    return Bundle.module
    #else
    return Bundle(for: BundleToken.self)
    #endif
  }()
}
// swiftlint:enable convenience_type
{% endif %}
{% else %}
// No files found
{% endif %}
저기서 한 라인을 추가했는데요.
이름을 뽑아 LottieView에 json 파일 네임을 넘겨 쉽게 사용할 수 있도록 name이라는 프로퍼티도 생성되도록 stencil 파일을 수정해줍니다.
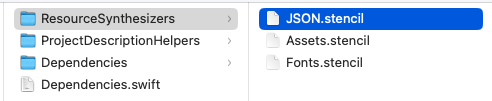
이 Stencil 파일이 완성되었으면 Lottie 첫번째 절차와 유사합니다.
이 파일을 Tuist > ResourceSynthesizers 폴더에 넣어줍니다!
그 다음으로, Lottie JSON 파일들을 필요한 모듈 Resources 폴더에 담아줍니다.

쉽죠!?
여기서도 중요한건 해당 파일의 확장자는 위와 반대로 lottie가 아니라 json이여야 합니다.

그럼 마지막으로 남은건 모듈 resourceSynthesizers에 추가해주는거에요.
import ProjectDescription
import ProjectDescriptionHelpers

let project = Project.make(
  name: "DesignSystem",
  targets: [
    .make(
      name: "DesignSystem",
      product: .framework,
      bundleId: "com.green",
      sources: ["Sources/**"],
      resources: ["Resources//**"],
      dependencies: [
      ]
    )
  ],
  resourceSynthesizers: [
    .custom(name: "JSON", parser: .json, extensions: ["json"]),
  ]
)
JSON 스텐실 파일을 이용했고 파서는 json 그리고 확장자도 json으로 커스텀하게 선언해줍니다.
아..! 여기서 하나 의문이 드는건 이 stencil 파일의 네이밍을 어떻게 가져가냐? 인데요.
Tuist 공식문서에서는 아래와 같이 안내하고 있습니다.

이렇게 매핑되어 있어요.
근데 내부적으로 이렇게 매핑되어 사용하고 있다 인것 같긴하고 꼭 이걸 지켜야하는지는 잘 모르겠네요🥲
자, 그럼 이제 똑같이 tuist generate 돌려주면 "TuistJSON+DesignSystem"이라는 파일이 Derived > Sources에 자동으로 생길거고 이걸 뷰에서 사용해주면 되요!
뷰에서 사용은 위 Lottie 첫번째 구현때와 동일해요.
struct MainView: View {
  var body: some View {
    LottieView(
      jsonName: JSONFiles.lottieFile.name,
      loopMode: .repeat(3.0)
    )
  }
}
이렇게 json 파일 네임을 넘겨 사용할 수 있습니다.
마무리
이제 Tuist에 기존 Assets 사용 말고도 애니메이션을 위해 Lottie JSON 파일을 많이 사용될것 같은데 고통받지 않고 적용해봤으면 좋겠어요!
제 글에 미비한 부분이나 더 편리하게 사용할 수 있는 방법이 있으면 공유 해주시면 감사하겠습니다🙇🏻
[참고 자료]
https://docs.tuist.io/2/guides/resources/
Accessing resources | Tuist Documentation
In this page documents how Tuist synthesizes accessors for resources to provide an interface that is consistent across all target products (e.g. framework. library).
docs.tuist.io
GitHub - tuist/tuist: 🚀 Create, maintain, and interact with Xcode projects at scale
🚀 Create, maintain, and interact with Xcode projects at scale - GitHub - tuist/tuist: 🚀 Create, maintain, and interact with Xcode projects at scale
github.com
GitHub - SwiftGen/SwiftGen: The Swift code generator for your assets, storyboards, Localizable.strings, … — Get rid of all S
The Swift code generator for your assets, storyboards, Localizable.strings, … — Get rid of all String-based APIs! - GitHub - SwiftGen/SwiftGen: The Swift code generator for your assets, storyboards...
github.com
'Tuist' 카테고리의 다른 글
Tuist에서 Firebase Crashlytics 설정하기 (15) 2023.04.27 Tuist를 통해 SwiftLint 사용하기 (10) 2023.04.25 Tuist - Custom Flags 다루기 (6) 2023.04.18 Tuist 도입으로 swiftGen 겉어내기 (with. TuistGenerator) (6) 2022.07.18 Tuist (4) 2022.07.11