-
Multiple Firebase EnvironmentsiOS 2021. 8. 21. 00:06
안녕하세요. 그린입니다🟢
이번 포스팅에서는 다중 파이어베이스 환경을 구축하는 방법에 대해 포스팅하겠습니다.
다중 파이어베이스 환경 구축이 왜 필요할까요?
개발을 하다보면 Prod 환경과 Dev 환경에서 다른 DB를 바라볼때가 있습니다.
만약 실제 프로덕션 파이어베이스를 가지고 테스트를 진행하면 DB 값이 바뀌게 되는 문제가 발생하니까
Dev 파이어베이스 DB 환경을 구축하는 경우가 많습니다.
그러니까 그런 Dev 파이어베이스 환경을 Xcode에서 가져오려면 다중 파이어베이스 환경 구축이 필요합니다!
자 그럼 왜 파이어베이스 환경 구축이 필요한지 알아보았는데요!
그럼 어떻게하면 구축할 수 있을까 알아봅시다.
다중 파이어베이스 환경 구축하기
생각보다 되게되게 간단합니다!
1. Firebase에서 각각의 SDK 설정 및 구성을 통해 GoogleService-info.plist 파일을 다운받습니다.
2. 아래와 같이 파일의 폴더를 Firebase로 설정하고 하위에 각 Prod / Dev 폴더를 만들고 하위에 해당하는 plist 파일을 넣습니다.
(여기서 폴더명은 마음대로 해도되지만 가독이 쉽게 위와 같이 설정을 권장합니다!)

💁🏻 여기서 중요한건 해당 plist 파일명을 바꾸면 안됩니다!
3. plist 파일의 Target Membership 체크는 해제해줍니다. 이후 설정을 통해 구분됩니다.
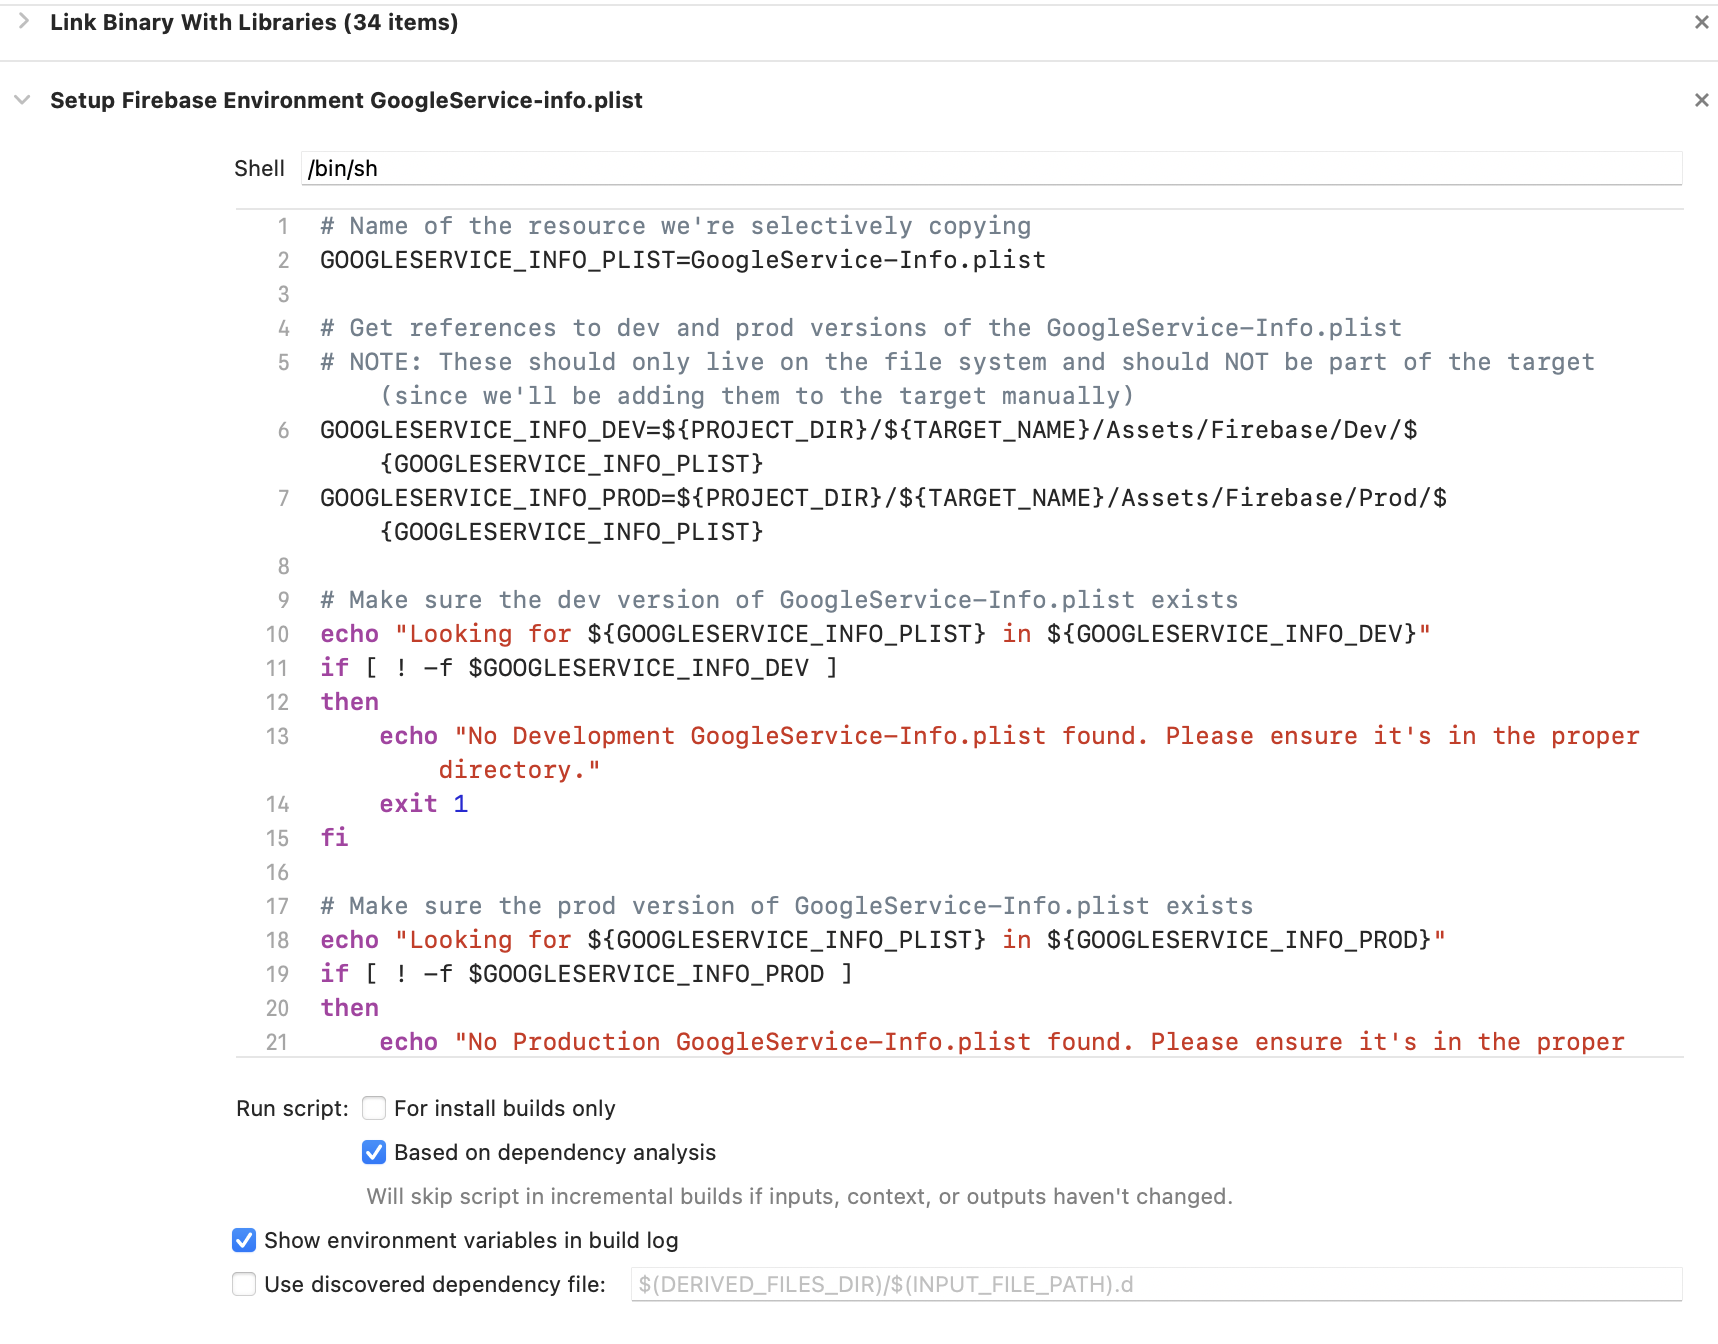
4. 타켓 > build phases 접근하여 아래와 같이 script phase를 설정해줍니다.

Link Binary With Libraries 경로 밑에 추가해야합니다.
또한 경로명은 Setup Firebase Environment GoogleService-info.plist로 설정합니다.
(만약 경로가 저처럼 Assets 폴더안으로 바뀌었다면 해당 파일이 있는 경로를 지정해줍니다.)
스크립트는 아래와 같이 설정해주면 됩니다.
# Name of the resource we're selectively copying
GOOGLESERVICE_INFO_PLIST=GoogleService-Info.plist

# Get references to dev and prod versions of the GoogleService-Info.plist
# NOTE: These should only live on the file system and should NOT be part of the target (since we'll be adding them to the target manually)
GOOGLESERVICE_INFO_DEV=${PROJECT_DIR}/${TARGET_NAME}/Assets/Firebase/Dev/${GOOGLESERVICE_INFO_PLIST}
GOOGLESERVICE_INFO_PROD=${PROJECT_DIR}/${TARGET_NAME}/Assets/Firebase/Prod/${GOOGLESERVICE_INFO_PLIST}

# Make sure the dev version of GoogleService-Info.plist exists
echo "Looking for ${GOOGLESERVICE_INFO_PLIST} in ${GOOGLESERVICE_INFO_DEV}"
if [ ! -f $GOOGLESERVICE_INFO_DEV ]
then
    echo "No Development GoogleService-Info.plist found. Please ensure it's in the proper directory."
    exit 1
fi

# Make sure the prod version of GoogleService-Info.plist exists
echo "Looking for ${GOOGLESERVICE_INFO_PLIST} in ${GOOGLESERVICE_INFO_PROD}"
if [ ! -f $GOOGLESERVICE_INFO_PROD ]
then
    echo "No Production GoogleService-Info.plist found. Please ensure it's in the proper directory."
    exit 1
fi

# Get a reference to the destination location for the GoogleService-Info.plist
PLIST_DESTINATION=${BUILT_PRODUCTS_DIR}/${PRODUCT_NAME}.app
echo "Will copy ${GOOGLESERVICE_INFO_PLIST} to final destination: ${PLIST_DESTINATION}"

# Copy over the prod GoogleService-Info.plist for Release builds
if [ "${CONFIGURATION}" == "Release" ]
then
    echo "Using ${GOOGLESERVICE_INFO_PROD}"
    cp "${GOOGLESERVICE_INFO_PROD}" "${PLIST_DESTINATION}"
else
    echo "Using ${GOOGLESERVICE_INFO_DEV}"
    cp "${GOOGLESERVICE_INFO_DEV}" "${PLIST_DESTINATION}"
fi

if [ $ENABLE_PREVIEWS == "NO" ]
then
  ${BUILD_DIR%Build/*}SourcePackages/checkouts/firebase-ios-sdk/Crashlytics/run
else
  echo "Skipping the script because of preview mode"
fi
마지막에 ENABLE_PREVIEWS == "NO"를 해준 이유는
해주지 않는다면 매번 Preview 빌드시 에셋 복사를 하여 프리뷰를 resume 하라고 나옵니다.
이에 해당 스크립트로 처리해줍니다.
5. AppDelegate에서 Firebase configure 설정
class AppDelegate: UIResponder, UIApplicationDelegate {
  func application(_ application: UIApplication, didFinishLaunchingWithOptions launchOptions: [UIApplication.LaunchOptionsKey: Any]?) -> Bool {
  	...
    FirebaseApp.configure()
    return true
  }
이렇게 하면 모든 설정이 끝났습니다!
그럼 위의 빌드들로 어떻게 구분할까요?
스키마를 설정할때 Debug와 Release를 구분하면됩니다.
위와 같이 설정되었으면 Debug 스키마를 타면 Dev 파이어베이스를 볼것이고,
Release 스키마를 타면 Prod 파이어베이스를 볼것입니다.
이렇게 간단?하지만 유용한 Multiple Firebase Environment 구축에 대해 알아봤습니다.
파이어베이스를 이용하며 하나씩 익혀보도록 하겠습니다🥳
[참고자료]
https://medium.com/rocket-fuel/using-multiple-firebase-environments-in-ios-12b204cfa6c0
Using Multiple Firebase Environments in iOS
The Firebase suite of products is great for getting basic mobile backend services up and running quickly. One of the most common Firebase…
medium.com
'iOS' 카테고리의 다른 글
Access Photo Library & Delete Asset (0) 2021.10.03 화면 캡쳐 및 녹화 방지 (9) 2021.08.28 DI & Swinject (0) 2021.08.03 Test Doubles - fake, stub, mock (0) 2021.07.22 ReactorKit으로 랜덤 통신 구현하기 (1) 2021.07.10