-
SwiftUI에서 Notification 사용하기SwiftUI 2023. 8. 17. 12:25
안녕하세요. 그린입니다 🍏
이번 포스팅에서는 SwiftUI에서 Notification을 받아 처리하는 방법에 대해 학습해보겠습니다 🙋🏻
흔히, 다른 뷰에서 이벤트가 발생하면 전역적으로 NotificationCenter를 통해 Notification을 쏘고 해당 노티피케이션을 수신하고 있는 다른 뷰들에서는 적절한 처리를 쉽게 해줄 수 있고 또 그럴때 많이 사용하죠!
SwiftUI에서 간단하게 사용하는 방법에 대해 구현해보고 알아가보시죠 🕺🏻
우선 두가지 방식을 사용해보려해요!
가장 먼저 SwiftUI에서 onRecieve를 통해 수신 받아 사용하는 방법입니다.
onRecieve 이용하기
코드가 간단하니 별도 파일을 쪼개지 않고 쉽게 한 뷰에서 보겠습니다.
import SwiftUI

struct ContentView: View {
  @State private var notificationText: String = ""

  var body: some View {
    VStack {
      Text(notificationText)
        .font(.title)

      Button(
        action: {
          sendNotification()
        },
        label: {
          Text("🚀 노티피케이션 발송 🚀")
            .padding()
            .foregroundColor(.white)
            .background(Color.blue)
            .cornerRadius(8.0)
        }
      )
    }
    .onReceive(NotificationCenter.default.publisher(for: .greenNotification)) { notification in
      if let text = notification.userInfo?["text"] as? String {
        self.notificationText = text
      }
    }
  }

  private func sendNotification() {
    NotificationCenter.default.post(
      name: .greenNotification,
      object: nil,
      userInfo: ["text": "🎉 발송 완료 \(Int.random(in: 1...10)) 🎉"]
    )
  }
}

extension Notification.Name {
  static let greenNotification = Notification.Name("greenNotification")
}
보시면 Notification.Name을 확장해 원하는 커스텀한 노티피케이션을 지정해줍니다.
그리고 실제 버튼을 누르면 sendNotification 메서드를 호출하고 내부에서 노티피케이션을 보내는데 userInfo로 text라는 레이블로 발송 완료 메시지를 담아줍니다.
여기서 메시지에 1부터 10까지 숫자중 랜덤하게 표출되도록 하면서 실제 노티피케이션 메시지가 송출될때마다 잘 수신되고 업데이트 된지 확인하려해요.
그럼 이제 이 노티피케이션이 송출되었고 수신하고 뷰에 바인딩해주면 끝나겠죠?
그걸 위해 해당 뷰에서 notificationText라는 State 변수를 두고 Text로 보여줄거에요!
여기서 해당 뷰에서 onRecieve를 통해 수신 받을건데요.
노티피케이션 센터의 아까 지정해준 greenNotification을 퍼블리셔로 지정해줍니다.
그럼 연결이 끝난것이고 노티피케이션이 송출되면 userInfo에 있는 text 레이블의 메시지를 뽑아 notificationText로 지정해주면 끝입니다 😃
되게 간단하지 않나요?
그럼 한번 동작을 볼까요?
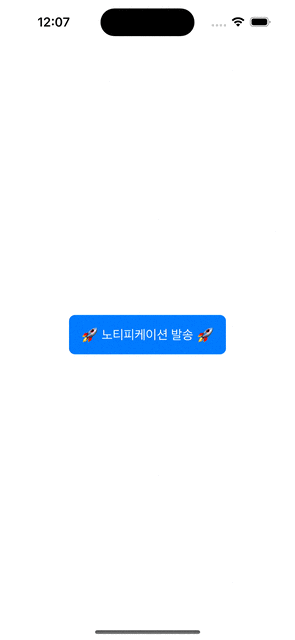
잘 되는것 같죠!?
그럼 이어서 ViewModel이 있다는 가정하에 두번째 방법으로 처리해볼께요.
ViewModel에서 처리하기
여기서는 Combine을 이용해 처리해볼꺼에요!
먼저 ViewModel 구성을 볼까요?
import SwiftUI
import Combine

class ContentViewModel: ObservableObject {
  @Published var notificationText: String
  private var cancellables: Set<AnyCancellable>

  init(
    notificationText: String = "",
    cancellables: Set<AnyCancellable> = []
  ) {
    self.notificationText = notificationText
    self.cancellables = cancellables
    bindingNotification()
  }

  private func bindingNotification() {
    NotificationCenter.default.publisher(for: .greenNotification)
      .receive(on: DispatchQueue.main)
      .sink { [weak self] notification in
        guard let self = self else { return }

        if let userInfo = notification.userInfo,
           let text = userInfo["text"] as? String {
          notificationText = text
        }
      }
      .store(in: &cancellables)
  }

  func sendNotification() {
    NotificationCenter.default.post(
      name: .greenNotification,
      object: nil,
      userInfo: ["text": "🎉 발송 완료 \(Int.random(in: 1...10)) 🎉"]
    )
  }
}
스트림을 받을 Notification을 bidningNotification 메서드로 분리하여 연결시켜줍니다.
물론 init에서 할 수도 있지만 코드 분리가 되면 좋으니까요ㅎㅎ
기본적인 combine 사용을 하실 수 있다면 어렵지 않은 코드입니다 🙋🏻
만약 combine 이해가 필요하면 아래 포스팅부터 시리즈를 조금 참고해보시면 도움이 될거 같아요!
https://green1229.tistory.com/221
Combine - Publisher
안녕하세요. 그린입니다🟢 오늘부터 진행될 포스팅은 combine에 관한겁니다🙋🏻 이전에 RxSwift에 대해서는 여러 목차로 순차적으로 진행한적이 있습니다! 그것과 유사하게 combine도 한번 쉬운것
green1229.tistory.com
이렇게 바인딩을 뷰모델의 초기화 시 호출합니다.
그리고 위에서의 코드와 동일하게 sendNotification 액션 메서드도 뷰모델로 들어왔어요!
combine으로 처리하냐 아니면 SwiftUI 뷰에서 onRecieve로 처리하냐 그 차이지 코드 자체는 동일합니다.
이렇게 뷰모델을 설정하면 뷰는 더 간단해집니다.
import SwiftUI

struct ContentView2: View {
  @StateObject var viewModel = ContentViewModel()

  var body: some View {
    VStack {
      Text(viewModel.notificationText)
        .font(.title)

      Button(
        action: {
          viewModel.sendNotification()
        },
        label: {
          Text("🚀 노티피케이션 발송 🚀")
            .padding()
            .foregroundColor(.white)
            .background(Color.blue)
            .cornerRadius(8.0)
        }
      )
    }
  }
}
뷰모델을 가지고 단순히 뷰의 역할만 액션을 넘겨주고 받은 데이터를 뿌려주기만 하면 되죠!
실행 결과는 위와 상동함으로 생략하겠습니다 🫠
정리
자 간단하지 않나요!?
SwiftUI에서 Notification을 쓸 일이 있으실때 요렇게 한번 해보는것도 좋아요 💪
해당 예제 코드들은 아래 제 깃헙 레포에 있으니 편하게 사용하셔도 됩니다!
https://github.com/GREENOVER/playground/tree/main/nofitication
'SwiftUI' 카테고리의 다른 글
UIApplicationDelegateAdaptor (48) 2023.08.28 SwiftUI에서 타이머 구현하기 (feat. User Notification) (50) 2023.08.22 SwiftUI로 음성메모 구현하기 (40) 2023.08.15 SwiftUI - monospaced를 이용한 Text 고정폭 설정하기 (22) 2023.07.20 SwiftUI - Custom ScrollTabView (18) 2023.07.10