-
Redacted를 통한 뷰 모자이크SwiftUI 2022. 9. 8. 13:56
안녕하세요. 그린입니다🍏
이번 포스팅에서는 SwiftUI에서 Redacted라는 View Modifier를 통해 뷰 및 내부 컨텐츠 요소들을 모자이크 하는 방법에 대해 학습하겠습니다🙌
우선 Redacted라는 뷰 모디파이어가 있다는것과 이런 단어를 처음 들어봤어요 저는..
그래서 이 단어가 뭔 뜻인지를 알고 가야될것 같아서 파파고를 켰습니다!
redacted?
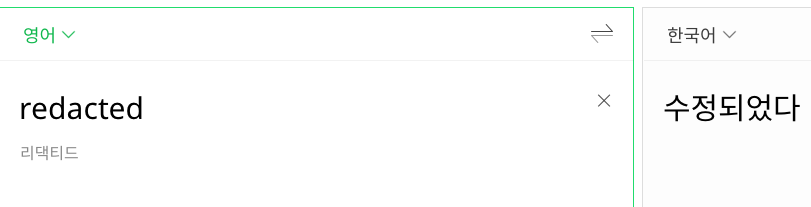
끝?
이걸 원한건 아닌데...
뭐 수정이라는 워딩이 포함되어서 결국 뭔가의 변형이 일어나는구나 SwiftUI로 치면 View의 수정이 일어나는구나 생각만 해봅시다.
근데 뭔가 조금 찝찝해서 조금 더 찾아봤어요!
redaction
원형을 찾다보니 redaction이라는 정보를 찾아봤습니다.
https://en.wikipedia.org/wiki/Redaction
Redaction - Wikipedia
Text editing process involving the combining and altering of source texts into a single document Redaction is a form of editing in which multiple sources of texts are combined and altered slightly to make a single document. Often this is a method of collec
en.wikipedia.org
역시 위키가 짱..!
위키의 redaction에 대한 소개를 발췌해봤습니다.
편집은 여러 텍스트 소스를 결합하고 약간 변경하여 단일 문서를 만드는 편집 형식입니다. 종종 이것은 유사한 주제에 대한 일련의 글을 수집하고 결정적이고 일관된 작업을 만드는 방법입니다. 이 단어는 삭제라고도 하는 문서에서 민감한 정보를 제거한다는 다른 의미로도 사용됩니다.
라고 하네요.
조금 유의미한 정보를 얻을 수 있었어요.
내용을 정리해보자면,
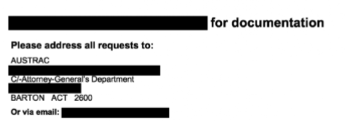
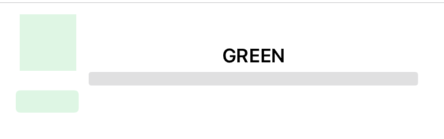
위와 같은 이미지처럼 민감한 정보를 제거하는것처럼 어떤 컨텐츠에 대해 모자이크 처리하도록 수정해주는 역할이라고 볼 수 있을것 같아요.
그렇다면 우리가 해볼 redacted 뷰 모디파이어를 통해 뷰 및 컨텐츠를 조건에 따라 모자이크 처리하고 해제하는 그런 기능을 구현해볼 수 있지 않을까 합니다!
자 그럼 본격적으로 해당 뷰 모디파이어에 대해 공식문서부터 보고 학습해보죠!
redacted(reason:)
아래 참고자료의 공식문서 링크가 있습니다.
공식문서에서는 조금 도움이 될 지 모르겠지만 이렇게 소개하고 있습니다.
"뷰 계층 구조에 수정을 적용하는 이유를 추가합니다"
음 수정은 모자이크같은것 오케이 알겠는데 뒤에 나오는 이유가 뭘까요?
그건 선언부를 보면 조금 더 명확히 알 수 있어요.
func redacted(reason: RedactionReasons) -> some View파라미터로 RedactionReasons 타입의 수정 이유에 대해 받는것 같습니다.
너무 간단한 선언이고 특별한것이 없네요!
RedationReasons
위에서 파라미터로 받는 중요한 타입인 RedationReasons에 대해서 살펴보고 갈까합니다.
화면에 표시된 데이터에 수정을 적용하는 이유라고 보면 될것 같아요.
선언은 아래와 같이 구조체로 되어 있습니다.
struct RedactionReasons단순하죠 아주.
여기 타입에 들어올 수 있는 이유들은 두가지입니다.
static let placeholder: RedactionReasons
static let privacy: RedactionReasons
placeholder와 privacy입니다.
특별히 더 소개할건 없을것 같고 이 두개의 개념에 대해 조금 딥하게 이어서 보겠습니다!
placehorder
뷰 자체에 대해 원래의 사이즈 및 모양을 유지하지만 정상적으로 나타나는것이 아닌 제네릭 플레이스홀더로 표시되도록 자동으로 마스킹합니다.
사용자에게 직접 노출되지 않고 그 영역만 차지하는 UI를 만들게 됩니다.
즉 쉽게 생각해서 모자이크 처리 된다고 보면 좋을것 같아요.
privacy
개인 정보를 보호하기 위해서는 표시되는 데이터를 가려야하고 이럴때 이 속성을 사용합니다.
SwiftUI에서 적용할 수 있는 코드로 보겠습니다.
struct BankingContentView: View {
  @Environment(\.redactionReasons) var redactionReasons

  var body: some View {
      if redactionReasons.contains(.privacy) {
          FullAppCover()
      } else {
          AppContent()
      }
  }
}
이와 같이 privacy의 조건이면 앱 커버를 노출시켜 화면 보호뷰로 가려버릴 수 있습니다.
자...!!! 이제 개념에 대해서 지겹게 봤으니 실제로 적용해보면서 재밌는걸 해보시죠ㅎㅎ
redacted View Modifier 적용하기
우선 선코드 후설명 가겠습니다.
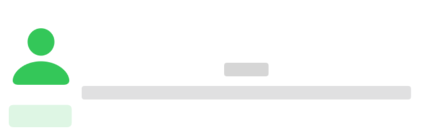
import SwiftUI

struct Developer: Hashable, Decodable {
  let name: String
  let description: String
  let followers: Int
}

extension Developer {
  static let mock = Developer(
    name: "GREEN",
    description: "The World's Most Famous iOS Developer",
    followers: 1229
  )
}

private struct DeveloperView: View {
  let developer: Developer

  var body: some View {
    HStack {
      VStack {
        Image(systemName: "person.fill")
          .resizable()
          .frame(width: 50, height: 50)
        Text(String(developer.followers))
          .font(.title)
      }
      .foregroundColor(.green)

      VStack {
        Text(developer.name)
          .font(.headline)
        Text(developer.description)
          .foregroundColor(.secondary)
      }
    }
  }
}

struct DeveloperListView: View {
  var body: some View {
    VStack(spacing: 10) {
      DeveloperView(developer: .mock)
      Divider()
      DeveloperView(developer: .mock)
        .redacted(reason: .placeholder)
    }
  }
}
제가 만들어볼 화면은 개발자 정보에 대한 화면입니다.
먼저 모델 타입인 Developer에서는 이름, 설명, 팔로워 수를 가지고 있습니다.
그리고 해당 목 데이터도 만들어줍니다.
그 다음 DeveloperView에서 해당 타입을 받아 적절한 화면을 구성해줘요.
마지막으로 DeveloperListView에서 DeveloperView를 단순히 올려주면 끝!
다른 부분은 전부 SwiftUI를 해보셨다는 가정에서는 쉽게 이해되실거라 생각해요.
여기서 오늘 학습할 redacted 뷰 모디파이어가 있습니다.
가장 마지막 코드 라인을 보면 두번째 DeveloperView에 이 모디파이어를 플레이스홀더로 적용했습니다.
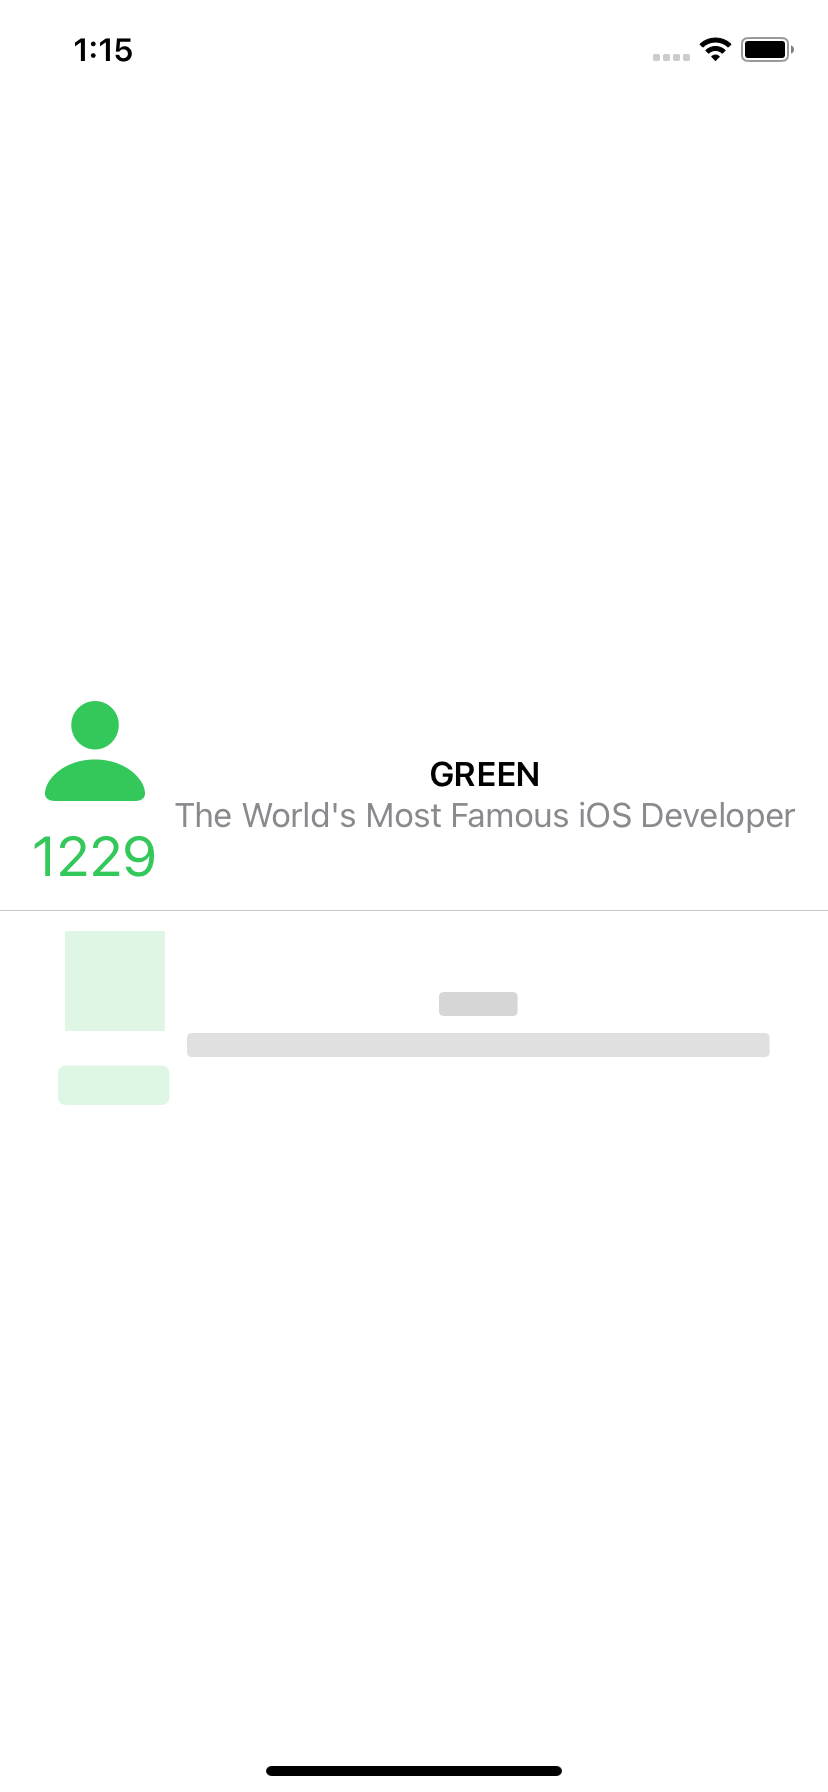
짜잔 결과는 요렇게!
이렇게 정보가 보이지 않고 모자이크 처리됩니다.
redacted의 reason 설정을 통해 모자이크 처리 및 해제하기
자 그럼 모자이크를 조건에 따라 변경해주려면 어떻게 하면 좋을까요?
이것도 선코드 후설명 ㄱㄱ!!
struct DeveloperListView: View {
  @State var isLoading: Bool = false

  var body: some View {
    VStack(spacing: 10) {
      DeveloperView(developer: .mock)
      Divider()
      DeveloperView(developer: .mock)
        .redacted(reason: isLoading ? [] : .placeholder)
    }
    .onAppear {
      DispatchQueue.main.asyncAfter(deadline: .now() + .seconds(2), execute: {
        isLoading = true
      })
    }
  }
}
위의 코드 구현과 동일하게 달라진점은 isLoading State 프로퍼티를 통해 onAppear 시 타임 인터벌을 걸어줬습니다.
그래서 2초 후 해당 값을 변경해줍니다.
redacted 메서드 사용 시 reason에는 이 프로퍼티를 가지고 true이면 정상적으로 노출되고 false이면 모자이크 되도록 해줬어요.
그럼 아래와 같은 결과가 나타납니다🙌
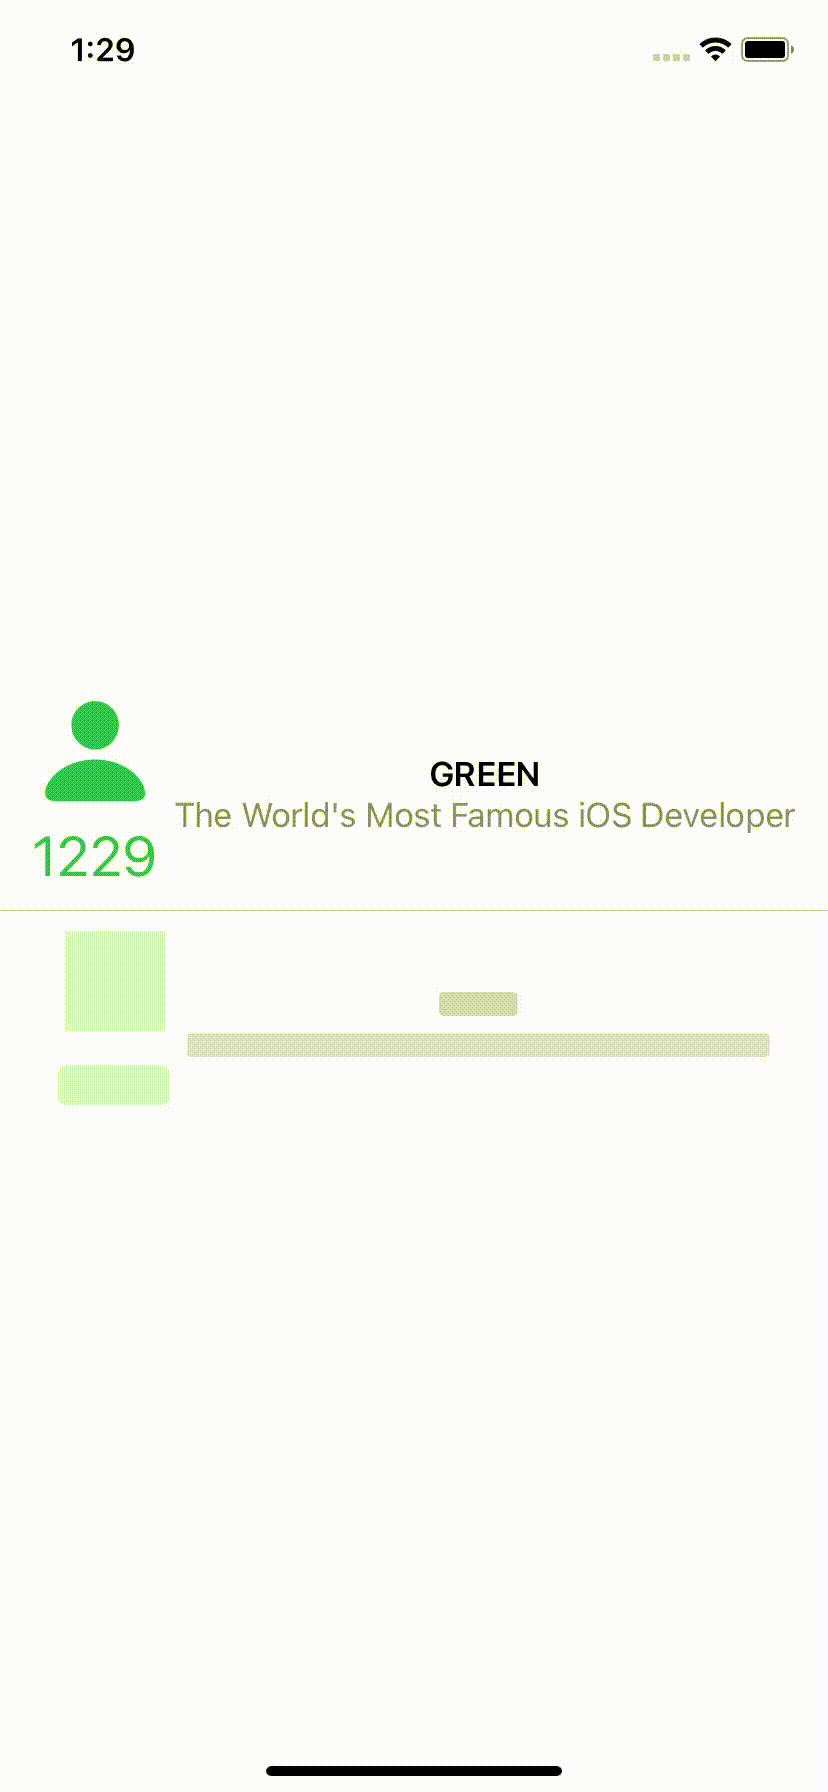
2초 후 모자이크가 해제되는걸 볼 수 있습니다.
unredacted 사용하기
redacted가 모자이크 처리를 해줬다면 unredacted 뷰 모디파이어는 반대로 해제 시켜주는것입니다.
Text(developer.name)
  .font(.headline)
  .unredacted()
간단하게 name에만 이 모디파이어를 적용시키고 이를 감싼 뷰에 redacted를 붙였다고 해봅시다.
그러면 결과가 이렇게 나와요!
unredacted가 부분적으로 잘 적용된걸 볼 수 있습니다.
RedactionReasons init하여 사용하기
위 조건들로 모든걸 구현할 수도 있지만 직접 RedactionReasons을 init해 만들어 사용할 수도 있습니다.
이것도 선코드 후설명 ㄱ ㄱ
extension RedactionReasons {
  static let text = RedactionReasons(rawValue: 1 << 2)
  static let images = RedactionReasons(rawValue: 1 << 4)
}

extension View {
  @ViewBuilder func unredacted(when condition: Bool) -> some View {
    if condition {
      unredacted()
    } else {
      redacted(reason: .placeholder)
    }
  }
}
먼저 RedactionReasons을 확장시켜 안에 RedactionReasons타입으로 스태틱 프로퍼티를 만들어줍니다.
rawValue로 조건 값을 넣어줘요.
그리고 unredacted에는 없는 when 조건을 걸어주기 위해 View를 확장시켜 뷰빌더를 만들어줍니다.
private struct DeveloperReasonAdaptView: View {
  @Environment(\.redactionReasons) var reasons
  let developer: Developer

  var body: some View {
    HStack {
      VStack {
        Image(systemName: "person.fill")
          .resizable()
          .frame(width: 50, height: 50)
          .unredacted(when: !reasons.contains(.images))
        Text(String(developer.followers))
          .font(.title)
      }
      .foregroundColor(.green)

      VStack {
        Text(developer.name)
          .font(.headline)
        Text(developer.description)
          .foregroundColor(.secondary)
      }
    }
  }
}
Environment 변수로 reasons를 만들어줍니다.
그 다음 아까 사용부에서처럼 unredacted를 걸어줍니다.
대신 만든 when 조건이 담긴 뷰 모디파이어로 만들어줘요!
이렇다면 조건을 판단하고 아래와 같이 적절한 조건에 따른 모자이크 처리 및 해제를 보여줍니다.
마무리
와아아아아 하나 뿌셨네요!
뭔가 스켈레톤 UI를 만드는것 같은데 쉽고 간편하네요ㅎㅎ
애니메이션이 적용되고 그러진 않았지만요!
그래도 알쓸신잡처럼 잡지식 +1이 되었습니다🙌
위 예시 코드들은 아래 참고자료 중 두번째를 참고하여 각색했으며 제 아래 레포에서 확인해볼 수 있습니다.
https://github.com/GREENOVER/playground/tree/main/redacted
GitHub - GREENOVER/playground: 학습을 하며 간단한 예제들을 만들어 보는 작고 소중한 놀이터
학습을 하며 간단한 예제들을 만들어 보는 작고 소중한 놀이터. Contribute to GREENOVER/playground development by creating an account on GitHub.
github.com
[참고자료]
https://developer.apple.com/documentation/swiftui/gridrow/redacted(reason:)
Apple Developer Documentation
developer.apple.com
https://swiftwithmajid.com/2020/10/22/the-magic-of-redacted-modifier-in-swiftui/
The magic of redacted modifier in SwiftUI
Redacted modifier is the thing that will have a great impact on how iOS apps handle loading states. During WWDC20, Apple showed us the easy way of hiding the data from home-screen widgets using the redacted modifier. Today we will talk about using the reda
swiftwithmajid.com
https://developer.apple.com/documentation/swiftui/redactionreasons
Apple Developer Documentation
developer.apple.com
'SwiftUI' 카테고리의 다른 글
SwiftUI - DisclosureGroup & OutlineGroup (4) 2022.09.29 SwiftUI의 Text에서 verbatim 사용하기 (2) 2022.09.22 @FocusState 사용하기 (2) 2022.09.05 SwiftUI - isDetailLink (With. NavigationLink) (2) 2022.08.23 SwiftUI에서 MVVM 사용을 멈춰야 하는가? (6) 2022.07.28