SwiftUI Text에 stroke 적용하기 (feat. UIKit)
안녕하세요. 그린입니다 🍏
이번 포스팅에서는 SwiftUI Text에 stroke를 적용하는 두번째 방법에 대해 알아보겠습니다 🙋🏻
이전 첫번째 방법에 대해 기술한적이 있어요.
SwiftUI의 Text에 stroke 적용하기
안녕하세요. 그린입니다 🍏이번 포스팅에서는 SwiftUI의 Text에 테두리에 stroke를 넣는 방법에 대해 한번 구현해보겠습니다 🙋🏻 간단하기도 하고 제가 필요해서 한번 모디파이어로 빼보면서 만
green1229.tistory.com
해당 방법에서는 SwiftUI Text 자체에 shadow를 적절히 주어 표현했었는데요.
한계가 있었습니다.
stroke 두께를 늘릴수록 shadow가 크게 적용되고 그에 따라 사실 상 aliasing, 계단 현상으로 디자인이 매끄럽지 못하게 나타나는 한계가 있었어요 🥲
그래서, 사실 SwiftUI만으로는 매끄럽게 구현하기가 어려워 이번 두번째 방법을 소개해보려 합니다!
SwiftUI Text에 stroke 적용하기 (UIKit을 곁들인)
이번 방법은 UIKit을 곁들여 SwiftUI에서 보다 매끄럽고 편하게 사용하는 방법입니다.
코드를 먼저 보면서 하나씩 살펴보겠습니다 😃
가장 크게 세가지 핵심적인 컴포넌트가 필요합니다.
1️⃣ StrokedLabel - UILabel을 통해 실제 외곽선 드로잉을 담당
2️⃣ StrokedText - UIKit의 StrokedLabel을 SwiftUI에서 사용할 수 있도록 래핑
2️⃣ StrokedText Extension - SwiftUI 스타일의 뷰 모디파이어 지원
그럼 하나씩 살펴볼까요?
StrokedLabel
public class StrokedLabel: UILabel {
    var strokeWidth: CGFloat = 5.0 {
        didSet { setNeedsDisplay() }
    }
    var strokeColor: UIColor = .black {
        didSet { setNeedsDisplay() }
    }

    public override func drawText(in rect: CGRect) {
        let context = UIGraphicsGetCurrentContext()
        context?.setLineWidth(strokeWidth)
        context?.setLineJoin(.round)

        // 외곽선 그리기
        context?.setTextDrawingMode(.stroke)
        textColor = strokeColor
        super.drawText(in: rect)

        // 외곽선 내부 채우기
        context?.setTextDrawingMode(.fill)
        textColor = strokeColor.withAlphaComponent(0)
        super.drawText(in: rect)

        // 실제 텍스트 그리기
        textColor = .white
        super.drawText(in: rect)
    }
}
먼저 UILabel을 상속받아 외곽선을 그리는 커스텀한 UILabel을 만들어야 합니다.
drawText(in:) 메서드를 오버라이드하여 다음과 같이 세 단계로 텍스트를 그려줘요.
1️⃣ 외곽선 그리기 (.stroke 모드)
2️⃣ 외곽선 내부 채우기 (.fill 모드)
3️⃣ 실제 텍스트 그리기
이렇게 커스텀한 UILabel이 준비되었다면 SwiftUI에서 사용할 수 있도록 만듭니다.
StrokedText
public struct StrokedText: UIViewRepresentable {
    let text: String
    let strokeWidth: CGFloat
    let strokeColor: UIColor
    let foregroundColor: UIColor
    let font: UIFont
    var numberOfLines: Int
    var kerning: CGFloat
    var lineHeight: CGFloat?
    var textAlignment: NSTextAlignment

    // UIViewRepresentable 구현
    public func makeUIView(context: Context) -> StrokedLabel {
        let label = StrokedLabel()
        updateUIView(label, context: context)
        return label
    }

    public func updateUIView(_ label: StrokedLabel, context: Context) {
        // 기본 속성 설정
        label.strokeWidth = strokeWidth
        label.strokeColor = strokeColor
        label.font = font

        // AttributedString 설정
        let attributedString = NSMutableAttributedString(string: text)
        let range = NSRange(location: 0, length: text.count)

        var attributes: [NSAttributedString.Key: Any] = [
            .kern: kerning,
            .foregroundColor: foregroundColor,
            .font: font
        ]

        // 줄 높이 설정
        if let lineHeight = lineHeight {
            let paragraphStyle = NSMutableParagraphStyle()
            paragraphStyle.minimumLineHeight = lineHeight
            paragraphStyle.maximumLineHeight = lineHeight
            paragraphStyle.alignment = textAlignment
            paragraphStyle.lineBreakMode = .byTruncatingTail
            attributes[.paragraphStyle] = paragraphStyle
        }

        attributedString.addAttributes(attributes, range: range)
        label.attributedText = attributedString
        label.numberOfLines = numberOfLines
        label.textAlignment = textAlignment
    }
}
UIViewRepresentable을 구현해줘요.
여기서 기본 속성이나 AttributedString을 설정하고 행간, 자간에 대해 설정해주고 표현해줍니다.
더 나아가서 SwiftUI에 올려서 사용할 때 라인 수나 행/자간 등 추가적인 속성을 뷰 모디파이어로 설정할 수 있도록 해당 StrokedText를 확장해 뷰 모디파이어를 구현합니다.
StrokedText Extension
public extension StrokedText {
    func lineLimit(_ limit: Int?) -> StrokedText {
        var view = self
        view.numberOfLines = limit ?? 0
        return view
    }

    func multilineTextAlignment(_ alignment: TextAlignment) -> StrokedText {
        var view = self
        switch alignment {
        case .leading:
            view.textAlignment = .left
        case .trailing:
            view.textAlignment = .right
        case .center:
            view.textAlignment = .center
        }
        return view
    }

    func kerning(_ value: CGFloat) -> StrokedText {
        var view = self
        view.kerning = value
        return view
    }

    func lineHeight(_ value: CGFloat) -> StrokedText {
        var view = self
        view.lineHeight = value
        return view
    }
}
간단하죠?
그럼 SwiftUI 환경에서 사용해볼까요?
import SwiftUI

struct ContentView: View {
  var body: some View {
    StrokedText(
      text: "Hello, Green!",
      strokeWidth: 5,
      strokeColor: .black,
      foregroundColor: .white,
      font: .systemFont(ofSize: 24, weight: .bold)
    )
    .lineLimit(1)
    .multilineTextAlignment(.center)
    .kerning(2)
  }
}
이렇게 간단히 해당 커스텀 컴포넌트를 호출하여 뷰 모디파이어도 적용하고 사용할 수 있어요!
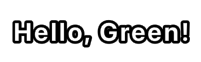
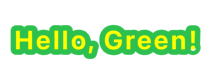
이렇게 입맛에 맞도록 stroke 색상이나 두께 그리고 text 색상들도 자유롭게 변경할 수 있습니다 😃
마무리
SwiftUI에서 이런 기본적인것을 제공해주면 얼마나 좋을까요? 🥲
점차 발전은 해가는것 같지만 정말 기초적인 이런 부분들의 제공은 아직 없는것 같아서 아쉽습니다.